
Circa 52 by Monaluna Pebbles Quilt Appliqué Tutorial
The Circa 52 quilt that we showcased at Fall Quilt Market was made by the lovely Melissa Lunden of Lunden Designs.


Take it away Melissa...
The design for the Pebbles Circa 52 quilt has many circles therefore I chose to applique the pebbles onto the quilt. I ended up trying two different adhesive methods and wanted to share what I learned with you.
Materials
Fabric for the applique piece
Fabric for the background
Either HeatnBond Feather Lite iron-on adhesive or 505 Spray and Fix
Coordinating thread

I tried HeatnBond Feather Lite iron-on adhesive and 505 Spray and Fix. They both worked well but also had some drawbacks. The HeatnBond took longer to use because it requires that you iron the adhesive on to the applique piece, cut out the shape and then iron the shape onto the background fabric. The 505 spray is faster to apply but it is way messier!

DIRECTIONS
The following directions are if you are using HeatnBond:
1. Cut out a piece of the applique fabric and a piece of the HeatnBond that is slightly bigger than your applique pattern piece.
 2. Iron the HeatnBond to your fabric carefully following the directions. I made sure to use medium heat and to turn off the steam on my iron.
 3. Cut out the pattern shape from the applique fabric.
4. Carefully pull back the paper from the fabric, being sure that the adhesive is stuck to the fabric and not still stuck to the paper. The adhesive looks like clear webbing. If the adhesive hasn't transferred, iron it again. That should do the trick.
 5. Iron the applique piece onto the background fabric.
The following directions are if you are using 505 Spray and Fix:
1. Cut out your applique piece.
 2. Now this is the messy part. Spray the 505 Spray and Fix to the back of the applique piece. Hold the can about 12" from the piece and be sure that whatever is behind the piece will not get ruined by being sprayed with sticky stuff. I suggest putting some paper down to catch the spray.
You will also get this stuff on your hands and it takes several washes to get it off.
 Please note that the picture above is just an illustration. I did not use the spray directly on my cutting mat or it would have been ruined. I just wanted a prettier background besides a paper bag :-)
3. Lay the applique piece onto the background piece and smooth out any wrinkles.

The remaining directions are the same for both adhesives:
1. Set your sewing machine to a tight zig zag stitch. Sew all the way around the applique piece making sure that stitches go over the raw edge of the applique piece.
 This is what your edges should look like when you are all finished.
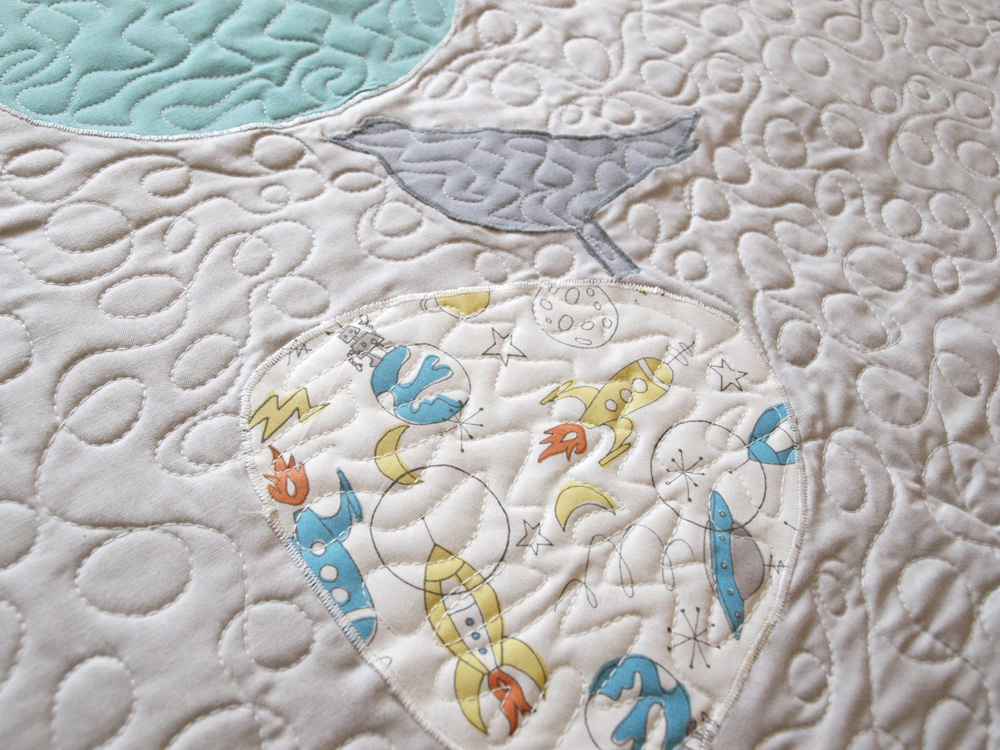
 Congratulations! You are all done and can now have all kinds of fun with appliques. This is what the appliques looks like on the finished quilt...pretty awesome.

Birchfabrics: Birch Fabrics Tutorial >>>>> Download Now
ReplyDelete>>>>> Download Full
Birchfabrics: Birch Fabrics Tutorial >>>>> Download LINK
>>>>> Download Now
Birchfabrics: Birch Fabrics Tutorial >>>>> Download Full
>>>>> Download LINK JH